
|
|
|
Carving Knives |

Edge Angles
Guidelines shown below are for Included Angles (α).
Green wood carving can use a lower included angle than when carving dry wood.
CB's USB Projection Calculator is recommended for calculating setup for Tormek knife jigs. There are a number of online calculators that can also be used for sharpening knives.
Remember, it's never the knife's fault.
Daniel Boulud
|
General Guidelines |
|||
|---|---|---|---|
|
Type |
α |
Grind Profile |
Notes |
| Chip Carving Knife | 20° | Concave or Slightly Convex |
Could be as low as 15° or 16° included angle, especially on softer woods. The Scandi grind can be "grabby" on the wood when slicing into it. The micro-bevel grind does not cut as cleanly. |
| General Carving Knife | 20° | (see below) |
Could be up to 25° included angle. |
| Sloyd Knife | 22° - 25° | (see below) |
The angle can be smaller or greater, depending on your need. The convex grind is preferred by some as it gives a radius from which to adjust the angle of attack. Others say differently. You will need to identify which you prefer. Some versions of this knife do not have the same angle on each side (this is more common with those which are hand-made). This means the Bevel Angle (β) may not be 50% of the Included Angle (α). It is advisable to use a Sharpie marker to ensure you are grinding the same angle as was delivered. Once you have achieved the angle that matches the grind, record it onto a label attached to the knife. This will enable you to repeat the grind easier next time (or at least make dialing it in faster). |
The shape of the grind used is a call best made by the tool's use, based on your own experience. Additional notes are available on separate web pages for Grind Profiles, and Micro / Secondary Bevels.
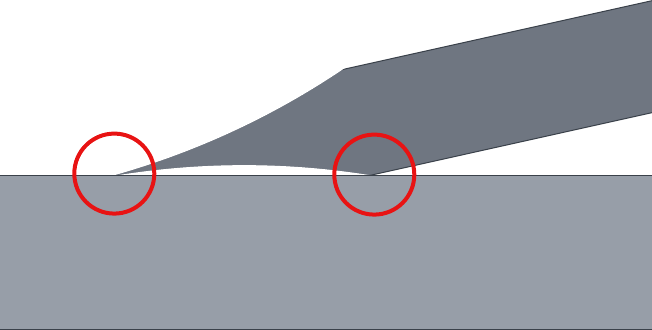
Using hollow grind points to set flat grind angle
If choosing to work with a flat grind, a hollow grind is a great start for helping to ensure easier work when using higher grit stones by hand.
When using flat stones for final sharpening (e.g., grits >2000), a hollow grind can make this easier. As shown in the picture to the left, the two points circled in red provide positive locations for setting the grinding action. It also reduces the amount of grinding needed as there is less metal meeting the grindstone.
|
|
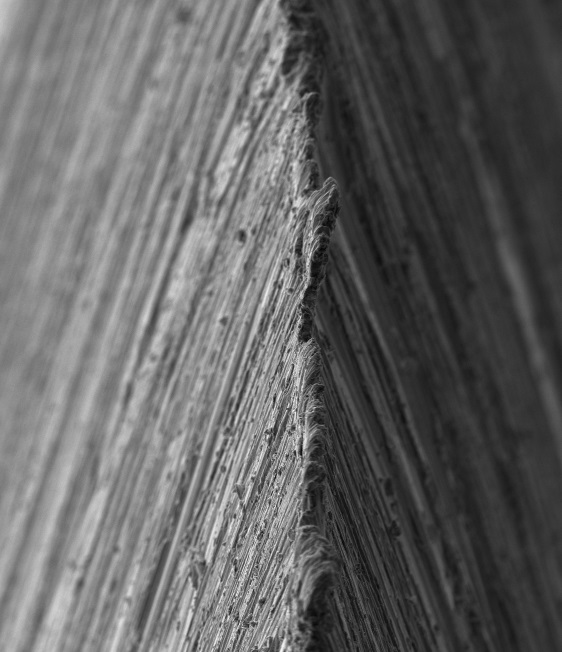
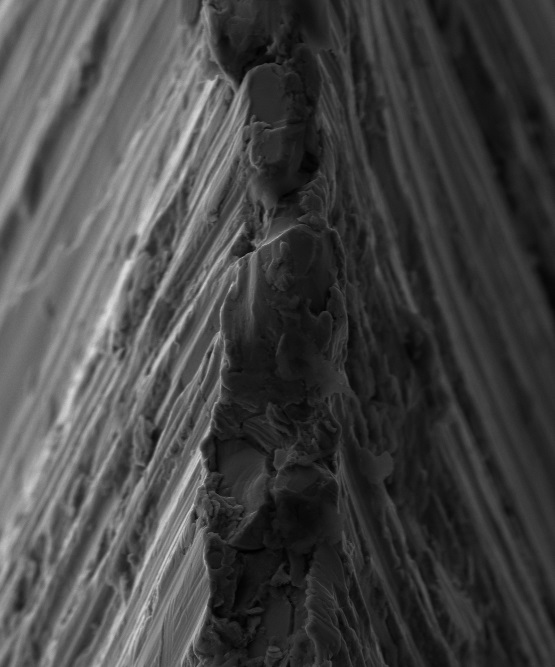
Click on either image for a bigger sized view.
Images courtesy Todd Simpson via Dr. Vadim Kraichuk of KnifeGrinders.
The scanning electron microscope (SEM) images to the right show the burr on a knife in the 1st image, that was then "ripped off" by cutting cross-grain into a piece of redwood in the 2nd image - loss of the sharp edge is obvious.
Key take-away from these photos : don't skip the honing step.
