
|
|
|
Metal Lathe Tools: Boring Bars |
* Temperature at which the tool material begins to soften appreciably. For HSS, it depends on the level of cobalt in the HSS.
|
|||||||||||||||||
Angles shown are good for hobbyists; grinds for production shops should consult a specialist.
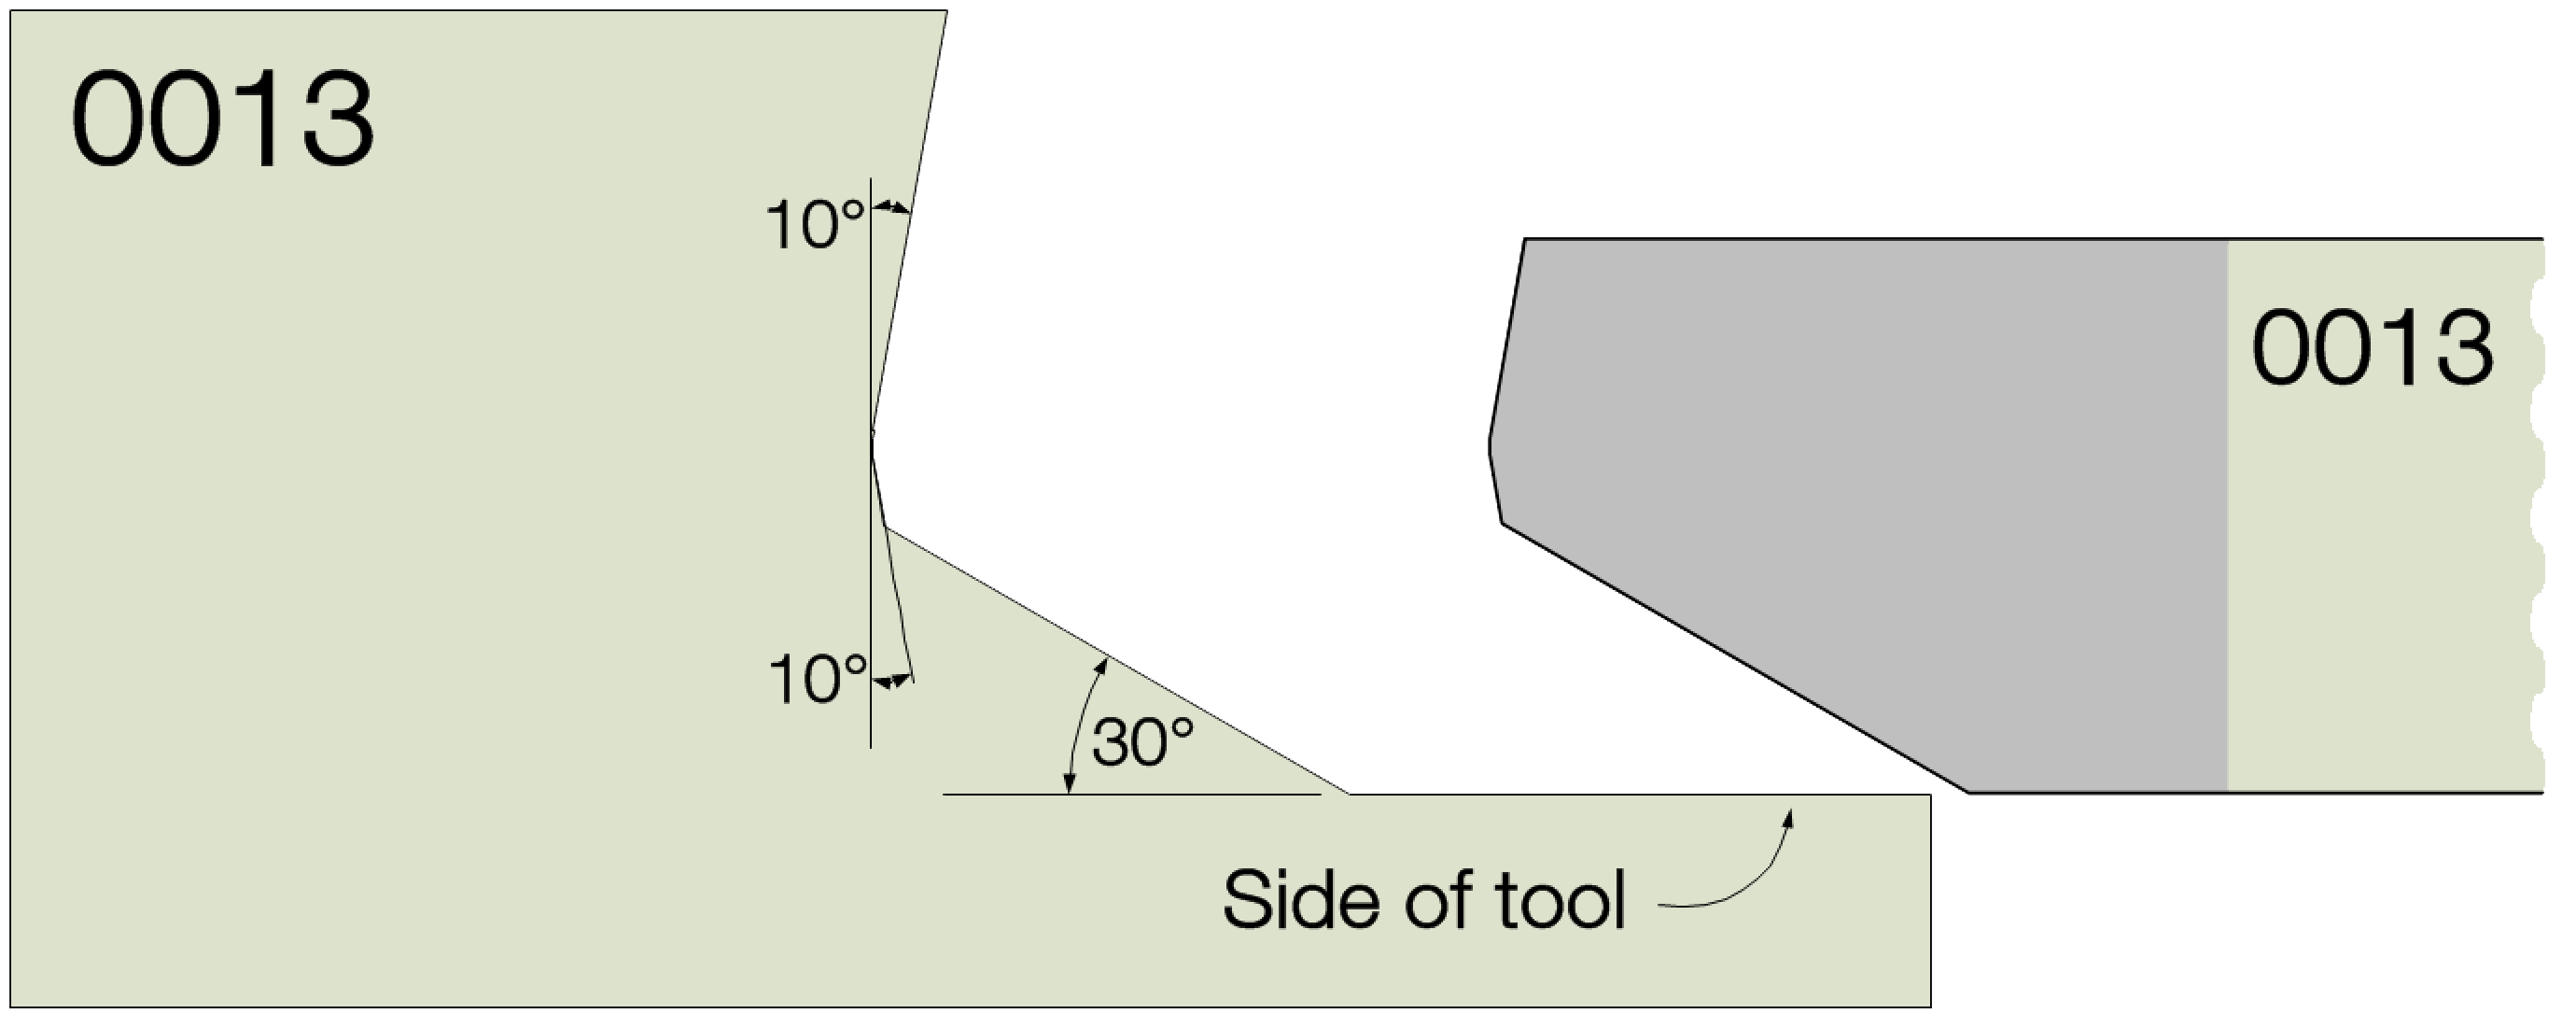
When both a relief and a clearance angle are outlined (e.g., Side Relief and Front Relief), this is done to facilitate easier resharpening. It is analogous to Secondary Bevels on woodworking chisels.
Resharpening should be done when the wear land reaches 1.5 mm (1/16 inch) high.
Angles shown are the effective angles, not the ground angles. Effective angles are increased or decreased, based on the angle by which the tool is presented against the work. Additionally, the vertical alignment of the tool (vs. the center line of the work) can also change the effective Front Relief Angle.

click on the gray block to see more
All angles are given the nomenclature designated by the American Standards Association (ASA).
|
Tool Shape - Boring Bar |
|||||||
|---|---|---|---|---|---|---|---|
|
|||||||
|
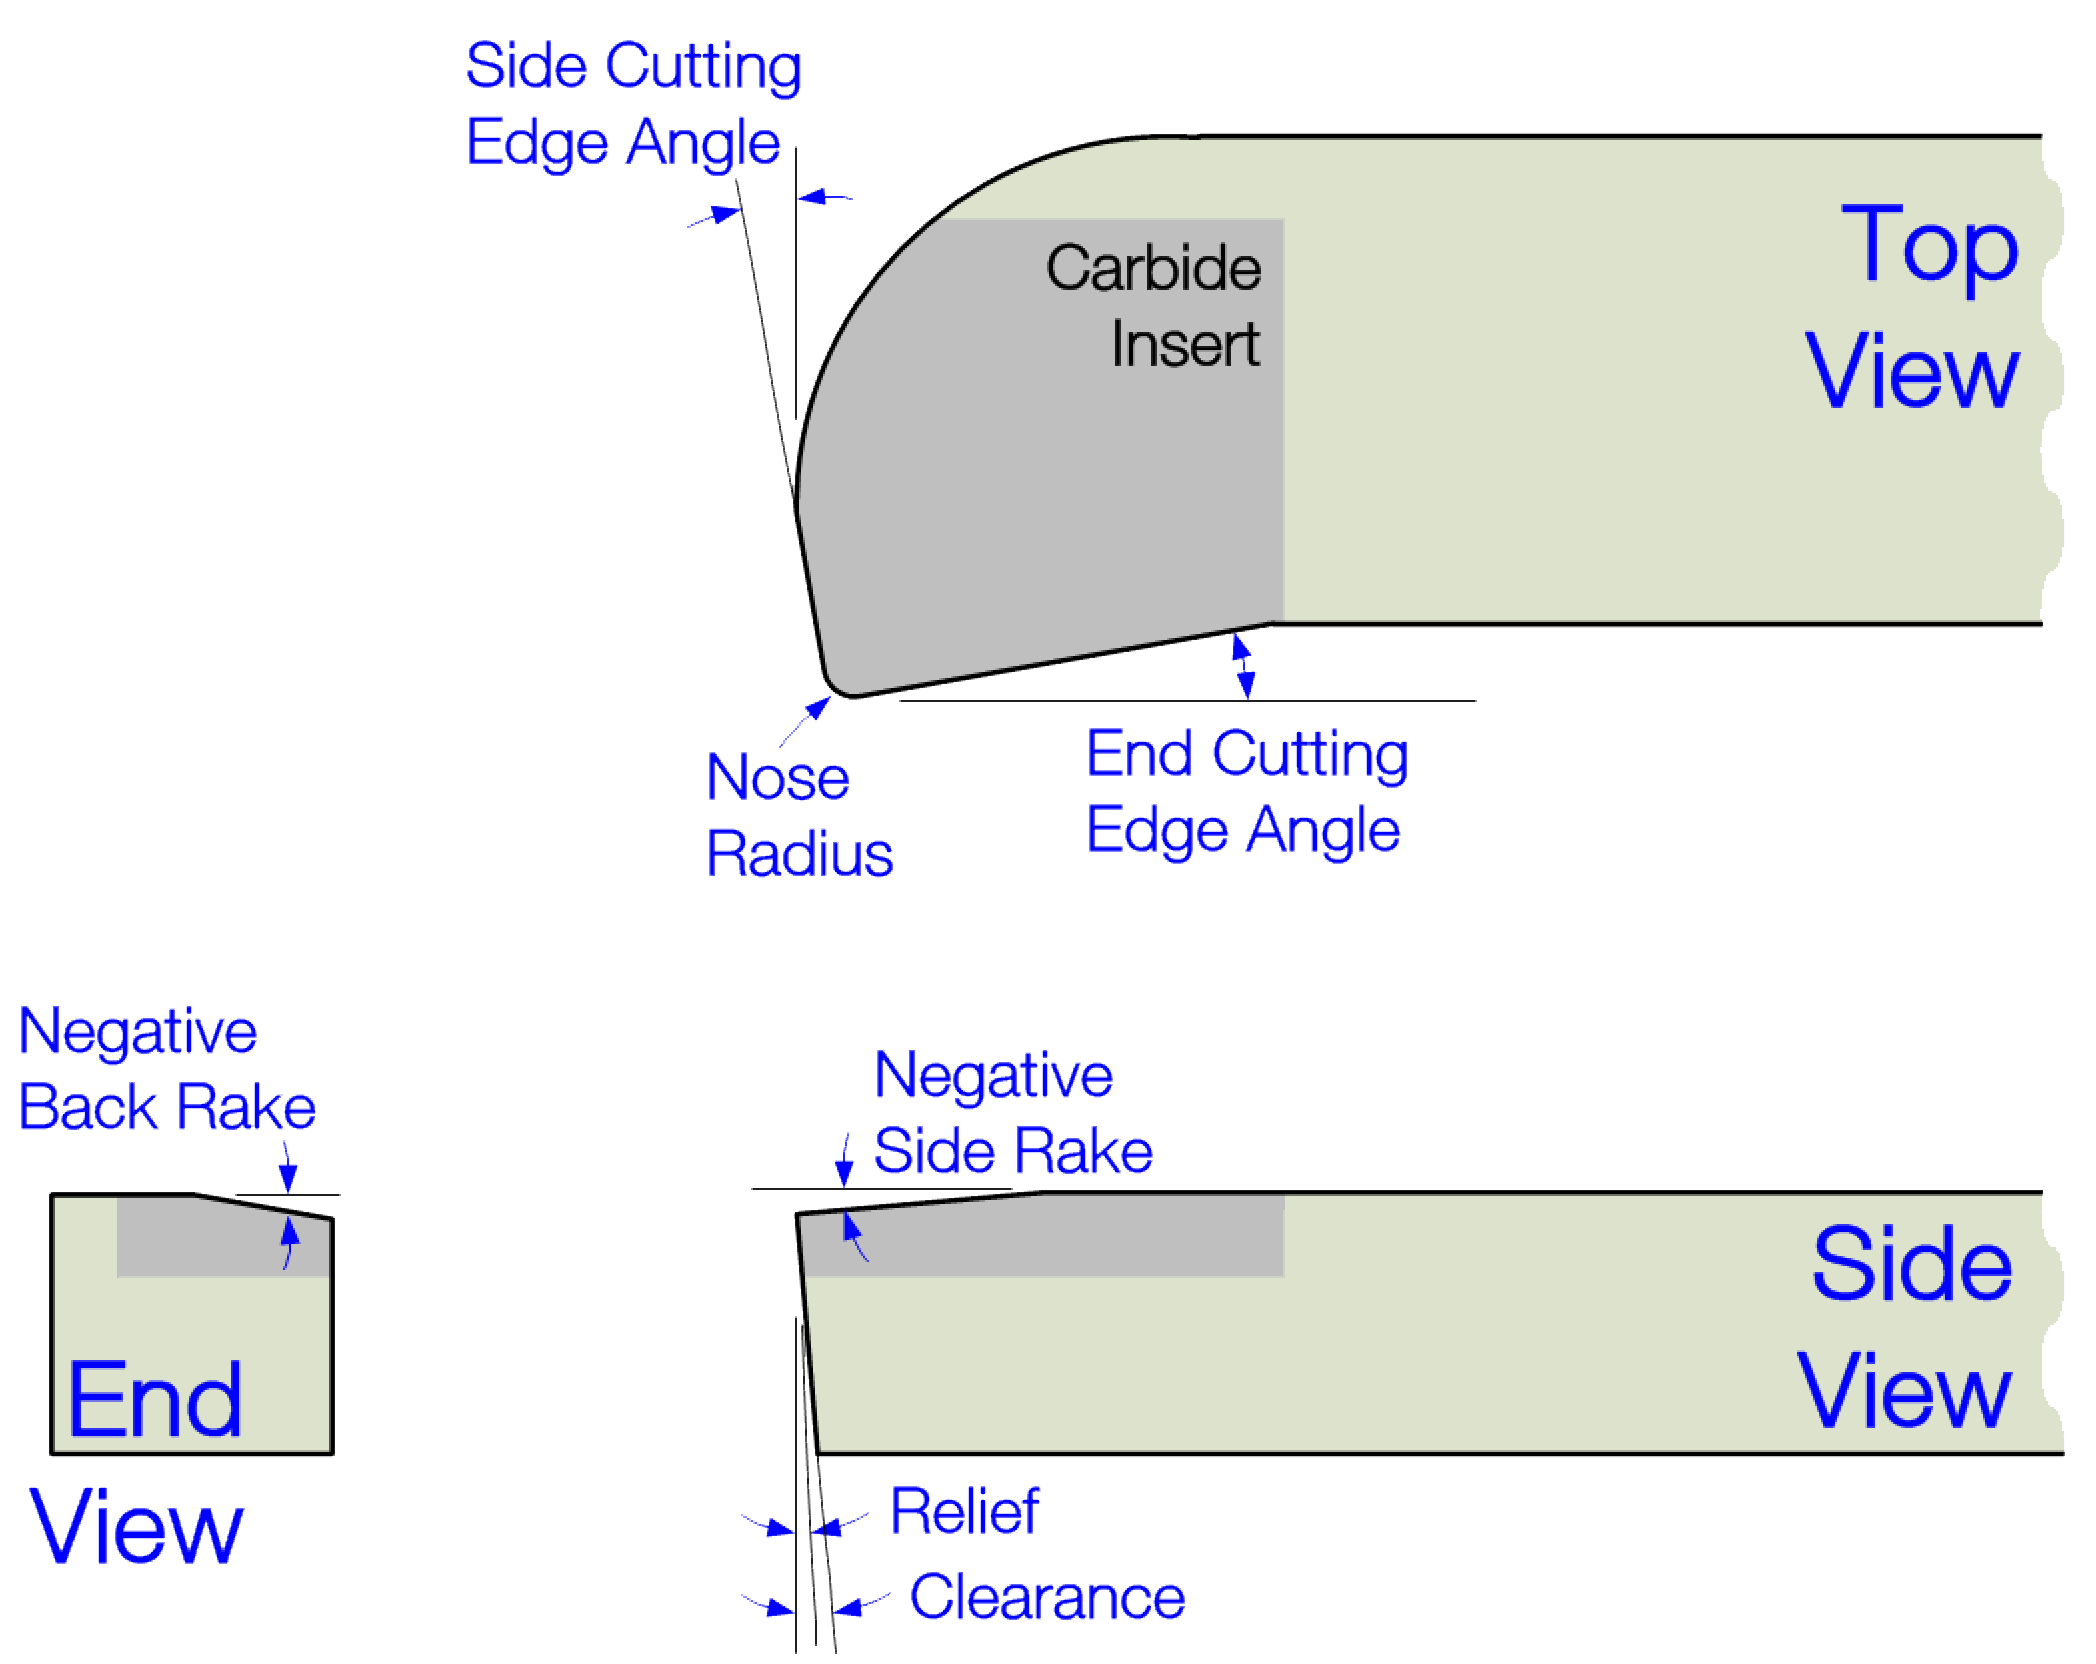
Back Rake |
Side Cutting Edge Angle |
Nose Radius |
End Cutting Edge Angle |
Side Rake Angle |
Side Relief Angle |
Side Clear-ance Angle |
Comments |
| -10° | 10° |
1.5 mm (1/16”) |
10° | -5° | 5° | 7° | Angles shown are the recommended effective angles, not the ground angles. |
If grinding this on a high speed grinder, be sure to manage the temperature so that the temper is not lost due to overheating. If there is a carbide insert, DO NOT cool by dipping in water. This will cause the carbide to crack due to shocks. Otherwise, cool by dipping as needed in water.
Contour Gauge
For resharpening, a contour gauge like shown to the left is recommended. One should be made for each tool, and it should be numbered to match the tool's number.
